I'm a thrift store junkie and on most every trip, I'd see lots of paintings with cool colors and all but I wasn't really looking for a painting with a beautiful sunset accompanied by a pack of wolves. However, after learning how to do this technique, I couldn't get to the local thrift stores quick enough. What? No paintings? Not good. I couldn't even find an old canvas that I could repaint myself!
Finally, a trip to Richmond to visit my sister (love her!) I found one at her local Goodwill store. $4.98....on sale for $2.98! The only draw back is, it's not on canvas. However, the colors are right and if nothing else.....it will be a learning tool. SOLD!
I'm new at this tutorial business, so I'll apologize ahead of time for forgetting to take photos of the different stages. I'll get better with each project.
Paint it with Words - Recycled Painting
Supplies:
- painting to recycle (forgot to take a 'before' picture)
- pencil
- off-white acrylic paint (or color(s) of your choice)
- flat-square paint brush
- foam brush
- sticky letters-numbers, etc. (Walmart has them for about $2.00)
- Homework: Find quotes, words, lucky numbers, etc. for your sign. Make sure when purchasing letters/numbers, you allow for letters used multiple times.
- Do not let the stickers stay on the painting overnight. They might peel off some of the original painting if allowed to set up.
- stain
- needle or pin
- old sock
- ruler and/or straight edge

Letter/number stickers

Off-white acrylic paint

Flat-square paint brush


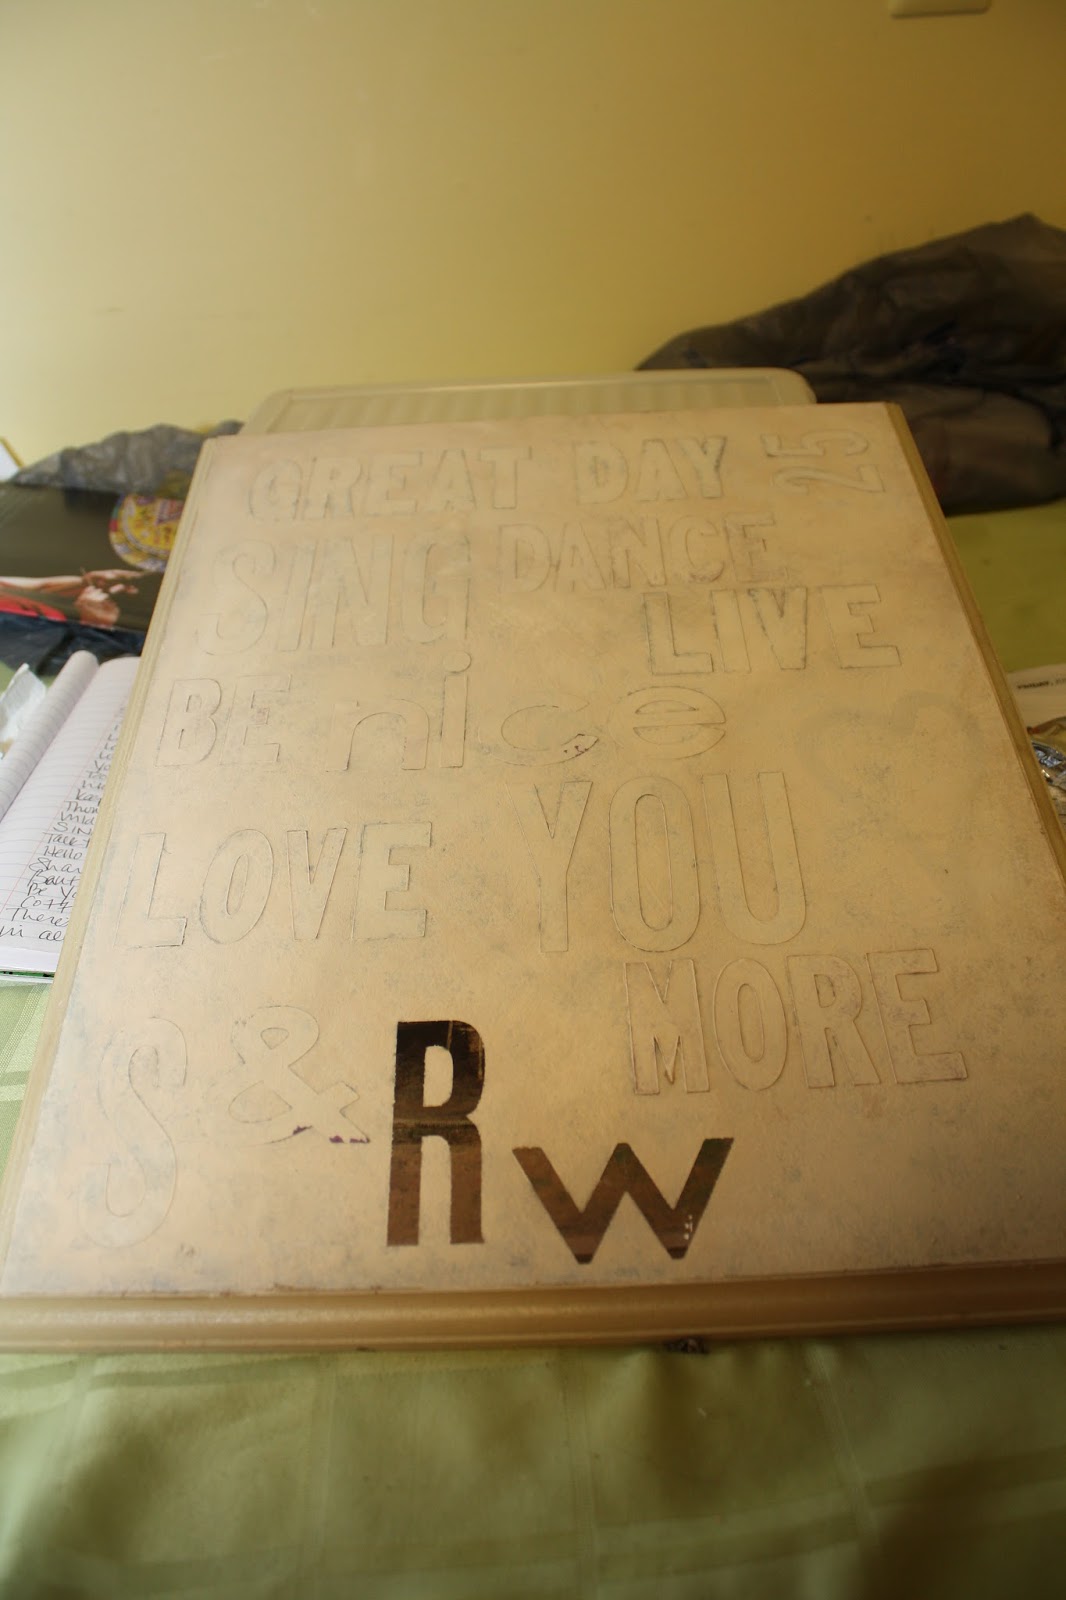
Once you decide the order of your quotes, words, etc., measure your letters/numbers to make sure you are allowing enough space from the top. As you are spelling everything out (check for mistakes!), it's OK to use different size letters when you are changing to another quote or word. Find something as a 'space' marker for marking the space in between rows (tape measure, piece of paper, etc.)
Start applying your letters/numbers, making sure to smooth out the edges.
Be creative and turn some words, numbers on the side (Great Day...is a favorite saying Dad used to say and Stephen and I were married on December 25th - so yes, it was a 'great day')
 |
| Measure and make sure your lines are straight! |
Next, using the acrylic paint and flat-square paint brush start re-painting the painting. Start with the letters/numbers and brush from the inside out. (If you brush into the letter, you risk getting paint underneath the letter). Keep going until the entire painting is off-white. Let dry for about 20 minutes and repeat the process.
 |
| Keep brush flat and paint from the inside out. |
 |
| Almost finished...... |
 |
| One coat finished. |
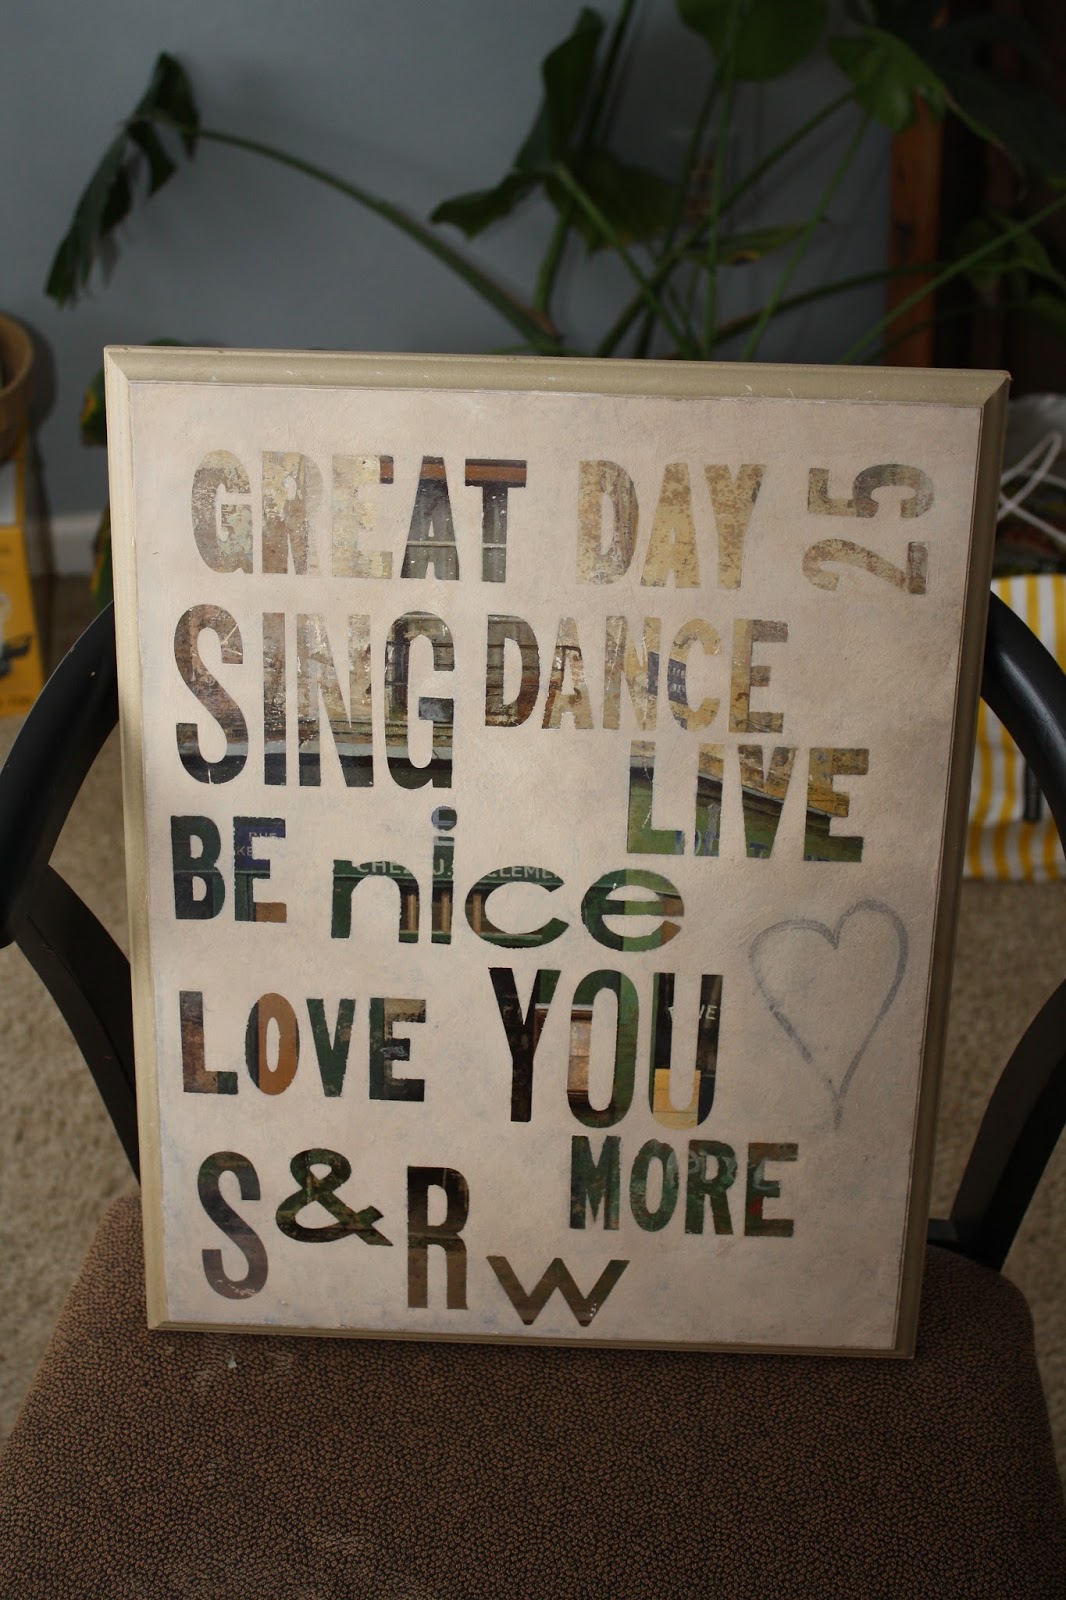
If this were a canvas, the brush strokes would not show as much. But because this is printed and sealed onto the wood, I didn't care for the brush strokes. After letting it dry for another 15+ minutes, using a wadded up paper towel (sponge, sock, rag) I dabbed the 3rd coat on to eliminate the brush strokes. Let dry for 30 minutes, making sure the entire painting is dry before moving on.
 |
| Oops! I removed two letters before remembering to take this photo! |
I decided to use stain to make it look older, but you can eliminate this step or use a lighter stain. Using the foam brush and only working in small sections at a time, brush on the stain and wipe it off with the old sock. Move the sock in a circular motion and work the stain into the paint. Repeat until the entire painting is covered. Let dry for 15 minutes.
Using the straight pin/needle, lift up the edge of each letter and carefully peel them off. I was able to salvage a few letters and will reuse them again.
 |
| Be careful you don't remove some of the original paint with the pin. |
After all the letters/numbers were removed, using the old sock with the stain residue on it, I went over some of the spots that I thought needed to be darker.
Project complete!


We all have favorite sayings, quotes, lucky numbers and I hope this tutorial inspires you to paint with words too. If you do, please share your photos and have a Great Day!
Love ya...mean it!
Robin
my goodness rob - we are cousin geniuses! I have done this very thing recently - and we didn't even talk about it - crazy! love it - and I've also done some cutting out of words and letters (in random places, old mags, etc)and then decoupaged them on a pic, pretty paper, fabric - whatever! we are awesome. ;-)
ReplyDeleteYes - we seem to do that quite often! THAT's a good thing! Do you every use wallpaper? I've seen some border rolls, etc. on clearance here and there. Also, check out the paint section at Walmart. I've found a few packs of letter stickers there on clearance. Love ya Cin!
ReplyDelete